Fuel testers (often called fuel samplers or drain cups) are handheld devices used to draw a small amount of fuel from an aircraft’s sump drains (low points in fuel tanks and lines).
Aviation fuel testers are used to sample, inspect, and verify the quality of fuel before flight—this is especially critical in general aviation where contamination can be a risk factor.
General aviation aircraft are designed to operate on a specific fuel type.
In most light airplanes, that’s Avgas 100LL—“100” for octane rating and “LL” for low lead.
(Despite the name, it does still contains lead! Watch out – lead is toxic!)
Checking for fuel contamination
Fuel testers are designed to:
- Capture a representative fuel sample
- Allow visual inspection
- Sometimes measure specific properties (e.g., water presence, fuel grade)
- Assist in ensuring and help confirm you’re actually looking at 100LL and not Jet A by checking for:
- Color
- Smell
- Presence of Water
- Debris
Color
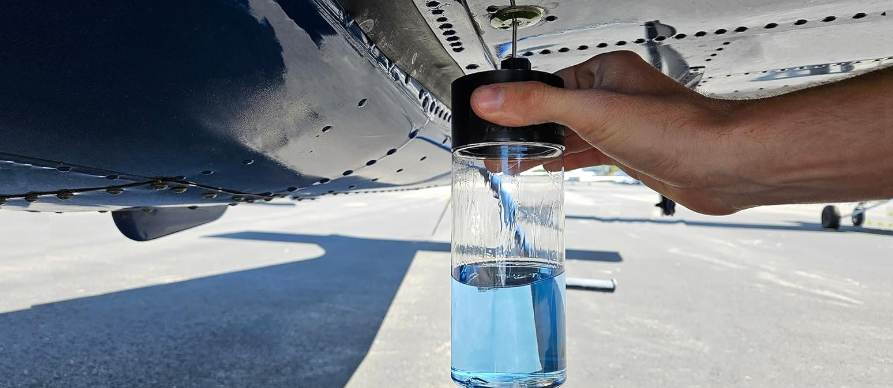
100LL is dyed blue. After sumping the tanks, hold the sample up against a white background—an aircraft wing or fuselage usually works well—to clearly see the tint.
Smell
Fuel odor is a useful secondary cue. Jet A has a kerosene-like smell (similar to clean diesel), while 100LL smells closer to high-octane automotive gasoline.
The presence of contamination in fuel and be the cause of the engine to lose power or completely fail in flight,
The two primary contaminants to look for are water and debris.
Water
Water doesn’t burn therefore If it’s present in the fuel system, it needs to be removed before flight. This is why sump fuel drains, which are located at the lowest points of fuel tanks and fuel systems. Water more dense than fuel and settles in these low spots of a fuel tank.
When you take a sample, small amounts of water show up as clear beads at the bottom of the tester; larger amounts form a distinct layer beneath the fuel.
Water in the fuel system is a leading contributor to engine power loss in piston aircraft (along with fuel starvation / exhaustion). Performing the check on fuel is a required action on the checklist and can prevent an unnecessary loss of engine power, creating an emergency situation and a forced landing.
Debris
Aviation fuel is refined to a high standard, but contamination can still occur. Sources include dirty fuel nozzles during refueling, deteriorating seals, or wear inside the tank or bladder. When you sump, debris typically appears as small dark particles or specks in the sample.
Common types of Fuel Testers
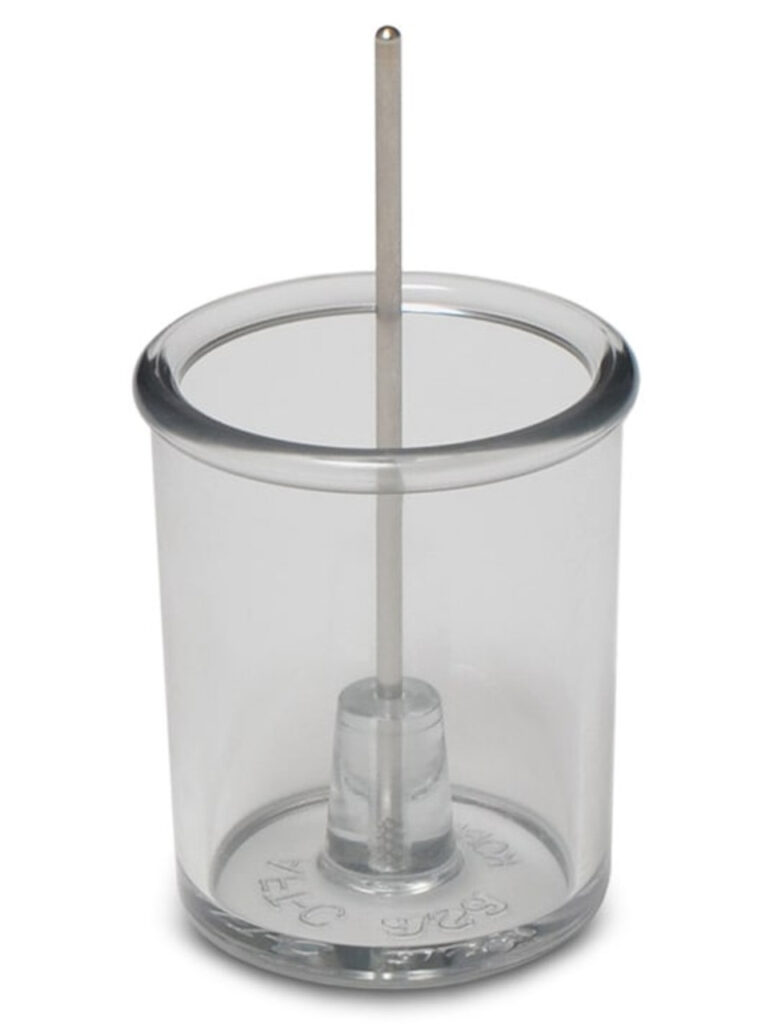
1) Basic clear cup tester
- Simple transparent container with a probe or valve actuator
- Used purely for visual inspection
- Most common in light aircraft
Pros: Cheap, reliable
Cons: No measurement capability
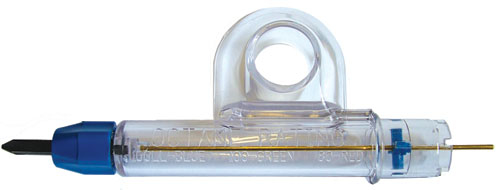
2) Tester with screwdriver tip
- Includes a metal pin to push sump drain valves
- Same function as basic cup but more ergonomic
- Screwdriver to tighten loose screws on the aircraft.
- Allows visual inspection fuels that will be visible in the tester
- Small size which takes up less space in flight bags!
3) Fuel strainer with mesh screen (GATS jar)
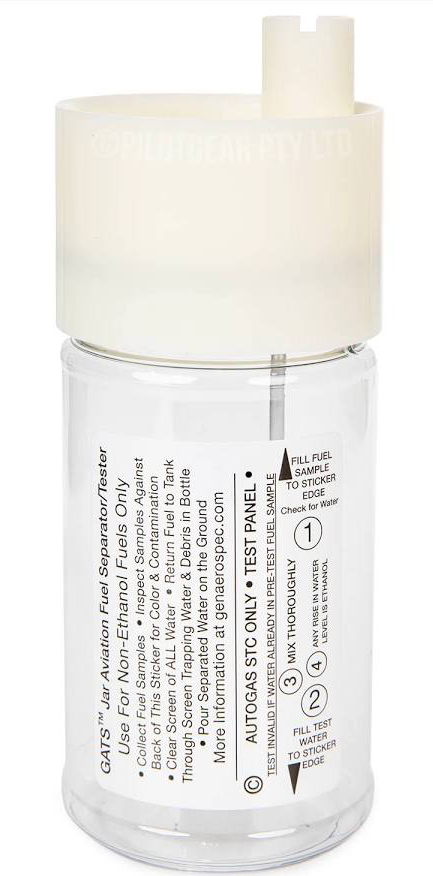
- GATS stands for Gasoline Analysis Test Separator.
- The “GATS Jar” Includes a fine mesh screen and water separation feature and is designed with a specific
functional purpose:- Contaminant Separation: When coated with fuel (AVGAS), the screen allows the fuel to passthrough while trapping water and solid debris inside the jar. Separates water visibly at the bottom
- Filters out contaminants, it allows pilots to safely pour clean fuel back into the aircraft’s tanks instead of discarding it.
- Separates water visibly at the bottom
Typically used in commercial or maintenance environments, not routine preflight.
How to test fuel (general aviation preflight)
- Always follow the POH / Checklist for aircraft.
- Always test fuel when prompted to on the checklist
- Locate sump drains
- Under each fuel tank
- Sometimes under the gascolator (fuel strainer)
- Use the tester
- Press tester tip into drain valve
- Fill the cup with fuel
- Inspect the sample
Look for:- Water: appears as clear bubbles or a distinct layer at the bottom
- Debris: particles floating or settled
- Color:
- Avgas 100LL → blue
- Jet A → clear/straw-colored
- Check for separation
- Let the sample sit briefly
- Water will settle at the bottom
- Repeat if contamination found
- Drain again until sample is clean
- Dispose or return fuel
- If clean and using a filtered tester (like GATS), fuel can be returned
- Otherwise, discard in a safe container
Best practices
- Check fuel before every flight.
- Sample every sump point (not just one)
- Pay extra attention after:
- Rain
- Temperature swings (condensation risk)
- If you find water – keep taking fuel samples (sump) until no water is present.
- Never rely on smell alone—visual inspection is primary
- If in doubt – don’t fly and ask for help!
Purchasing a fuel tester.
You will need a fuel tester early on in your flight training. This is an essential item for your flight bag and you will need it for every flight. Fuel tester are generally not expensive but prices vary depending on the type and functionality of the tester.
Testers are widely available from aviation retailers such as
Fuel Testers can also be purchased from any ECAC location.